
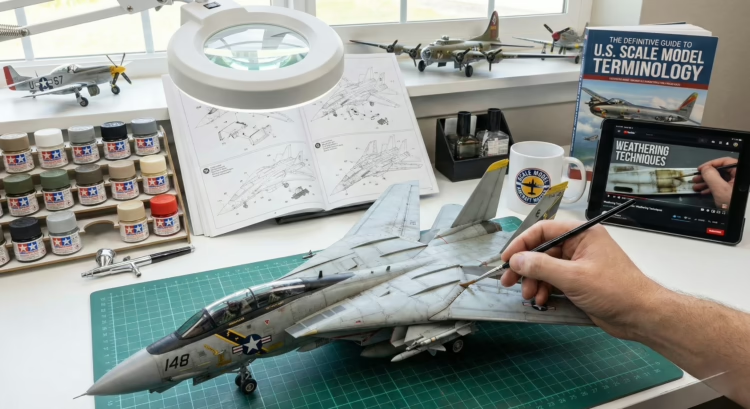
Nothing screams “plastic toy” faster than glossy, inconsistent sheen on your finished model. This guide shows you how a simple clear flat finish—applied correctly in just minutes—transforms decals, paint, and plastic into a unified, professional surface that finally looks like the real aircraft you’ve worked so hard to recreate.
You’ve spent weeks on your latest project. The cockpit detail is perfect, with individual instrument dials carefully painted and dry-brushed to highlight the raised detail. Every seam has been filled, sanded, and rescribed. Your camouflage pattern looks factory-fresh, with soft demarcation lines between colors. The decals went on without silvering, and you’ve added subtle weathering washes to the panel lines.
Yet something’s wrong. The model sits on your bench looking undeniably like a toy. Light bounces off the surface with that telltale plastic shine. The decals reflect light differently than the surrounding paint, creating visible edges that scream “sticker.” Clear parts gleam with an unrealistic glossiness. Despite all your effort, the model lacks the visual weight and presence of the real aircraft it represents.
This is what we call the “Plastic Curse”—the fundamental failure of a model’s surface finish to communicate the material reality of its subject. A real aircraft is constructed from aluminum alloys, steel, composite materials, and fabric, coated in industrial enamels that weather and oxidize over time. Your model is made of polystyrene. Without a specific intervention to alter how light interacts with its surface, the model will always reveal its true plastic nature.
Whether you’re building one of the best model airplane kits available today or working through a vintage short-run release, the difference between a contest-winning replica and a well-assembled toy often comes down to one thing: proper sheen management. The “5-Minute Fix” we’re about to explore is the application of a unified clear flat finish over your completed model. It’s a deceptively simple step—just spraying a clear coat over the finished surface—but it’s the single most transformative action you can take. In just a few minutes of careful work, this process eliminates unrealistic gloss, seals decals so they appear painted on rather than stuck on, and unifies all the different textures of paint, plastic, and filler into a single cohesive surface.
This guide provides everything you need to execute this critical final step correctly. We’ll cover the materials you need, the preparation steps that prevent common problems, the precise application technique, and how to troubleshoot issues if they occur. By the end, you’ll have the knowledge to transform your models from plastic assemblies into convincing scale replicas.
 Understanding the Problem: Why Your Model Looks Like a Toy
Before we can fix the problem, we need to understand exactly what’s causing it. The human eye is remarkably sensitive to surface texture and light reflection—it’s how we instinctively distinguish wet surfaces from dry, smooth from rough, and real from artificial.
The Physics of Sheen
Sheen is fundamentally about surface roughness at a microscopic level. A perfectly smooth surface—like polished plastic straight from the mold—reflects light rays in a coherent direction, creating sharp, distinct highlights. This is what we call “gloss.” The injection-molded parts in your kit have inherently smooth surfaces from the high-pressure steel molds used in manufacturing. Even paints labeled “flat” often dry with a slight satin sheen due to the chemical binders that hold the pigment to the plastic.
A “matte” or “flat” finish works differently. It contains matting agents—microscopic particles of silica or talc suspended in the clear binder. These particles create a jagged microscopic landscape on the surface. When light hits this rough surface, it scatters in all directions rather than reflecting coherently. This scattering eliminates the “hot spots” or specular highlights that our brains associate with plastic, wet, or polished surfaces.
Here’s the critical insight: real aircraft surfaces are rarely uniformly glossy. Operational military aircraft have weathered, oxidized finishes on most surfaces. Even when factory-fresh, the industrial enamels used on full-sized aircraft interact with light differently than a small plastic model held in your hand. This is where the “Scale Effect” comes into play. A highlight that moves smoothly across a 60-foot fuselage looks natural, but that same relative highlight moving across a 15-inch plastic fuselage makes the object look small, lightweight, and toy-like. The flat coat effectively simulates atmospheric diffusion, tricking the eye into seeing a large object at a distance rather than a small object up close.
The Three Sheen Problems
Most toy-like appearances result from three specific sheen-related failures:
Problem 1: Exposed Topcoat with Inconsistent Sheen
Many modelers finish painting their camouflage and consider the job done. However, different paint colors from the same manufacturer often have varying natural sheens depending on their pigment density and binder formulation. A “Flat Black” might dry dead matte due to high pigment load, while a “Dark Green” from the same line might dry to a satin finish. The result is a patchwork of reflectivities across your model. Light hits the wing and reflects dully off green areas but shines brightly off black areas. This inconsistency immediately signals “artificial” to the viewer’s eye.
Real aircraft weather and age uniformly. Even if different paints were originally used, exposure to UV radiation, atmospheric moisture, and environmental oxidation tends to equalize surface texture over time. A unified flat coat replicates this environmental equalization in seconds.
Problem 2: Shiny Decals Against Flat Paint
This is perhaps the most common and damaging error. Decals are printed on a carrier film that’s naturally glossy or satin to facilitate the printing process and allow the decal to slide off the backing paper. When you apply a glossy decal over flat or satin paint, the difference in reflectivity is stark. Light catches the edge of the carrier film, creating a visible “step” or halo that screams “sticker” rather than “painted marking.”
The situation gets worse if you didn’t apply a gloss coat before decaling. Without a perfectly smooth, glossy surface, air gets trapped in the microscopic texture of the flat paint underneath the decal, causing “silvering”—a shimmering, silvery haze that makes the marking look like it’s floating above the surface rather than being part of it.
Problem 3: The Multi-Media Patchwork
Advanced modeling involves integrating multiple materials: injection-molded plastic kit parts, polyurethane resin detail sets for cockpits and wheel wells, photo-etched brass details, and clear acetate canopies. Each material holds paint differently and has a different refractive index. Even with a primer coat, the surface sheen becomes chaotic as you add layers of weathering—oil washes, acrylic filters, pastel chalks, and pigments. You might have glossy oil wash stains sitting next to dead-flat pastel exhaust stains.
While some variation can enhance realism (fresh oil stains should look wet), a lack of baseline cohesive finish makes the model look like a collection of disjointed effects rather than a single physical object that’s been subjected to the elements. The flat coat acts as a unifying filter, bringing all these disparate elements into a single visual context.
The Solution: Materials You’ll Need
To execute the sheen correction effectively, you’ll need specific materials. The chemistry of these products matters as much as the technique—using incompatible products can cause cracking, bubbling, or crazing of the underlying plastic.
Essential Materials
Clear Flat Finishes:
For this critical step, we recommend Testors Dullcote (relabeled as “clear, flat lacquer finish”). This nitrocellulose lacquer has been the industry standard in U.S. modeling for decades. It can be airbrushed straight from the bottle or thinned for finer control. The lacquer “bites” into previous paint layers for maximum adhesion and dries to a profound, non-reflective matte finish that’s perfect for military aircraft modeling.
Alclad II Klear Kote Flat (ALC-314) is an excellent alternative. It’s a mineral-spirit based lacquer that comes pre-thinned for airbrush use. It dries to a very hard, consistent finish in about 10 minutes and is known for exceptional durability.
For modelers without spray booth ventilation, Tamiya Flat Clear (XF-86) offers a lower-odor acrylic option. Be aware that acrylics require more careful application to avoid “chalking”—a whitish, powdery finish that occurs if applied too heavily.
Clear Gloss for Pre-Decal Work:
You’ll also need a gloss clear coat for preparing surfaces before decaling. Alclad clear gloss lacquer works well, providing a hard, glossy surface that prevents silvering. Many modelers also use Future Floor Polish (now called Pledge Floor Gloss) as an inexpensive, effective gloss coat.
Thinners:
For lacquer-based products like Dullcote, you’ll need lacquer thinner. Generic hardware store lacquer thinner works fine, or you can use Tamiya Lacquer Thinner for better control. The standard thinning ratio for Testors Dullcote is 50:50—one part Dullcote to one part thinner.
Application Tools:
An airbrush gives you the most control over atomization and coverage. A double-action brush allows precise control of the air-to-paint ratio, which is essential for applying light mist coats. If you’re using bottled paint, add a few copper-coated BBs to the jar to act as agitators, breaking up the settled matting agents when you shake the bottle.
Preparation Materials:
A tack cloth removes microscopic dust immediately before painting. Make sure it’s low-tack to avoid leaving residue on your model. You’ll also want lint-free cloths for general cleaning and compressed air for blowing out cockpits and crevices.
Safety Equipment:
This is non-negotiable. Lacquer fumes contain neurotoxins and respiratory irritants. You need a respirator with organic vapor filters (rated NIOSH OV/P100)—simple dust masks don’t filter solvent fumes. If possible, work in a spray booth that vents outdoors. If you don’t have a booth, work outdoors or in an open garage while wearing your respirator.
Preparation: Setting Up for Success
The difference between success and disaster lies almost entirely in preparation. A clear coat seals your model at a specific moment in time. Any dust, fingerprint, or silvered decal trapped under this layer becomes permanent, uncorrectable without stripping the entire finish.
Surface Inspection
Before mixing a single drop of clear coat, conduct a thorough examination of your model.
Start with the fingerprint scan. Natural skin oils are acidic and can cause the clear coat to “fisheye”—separate into droplets—or yellow over time. Wipe the entire model with a lint-free cloth dampened with distilled water and a tiny drop of dish soap. This degreasing step removes oils you can’t even see.
Next, scrutinize your decals. Every marking must be fully adhered with no silvering. If you see that telltale silvery shimmer under any decal, stop immediately. Do not spray the clear coat over silvered decals—you’ll seal the air pocket permanently. Instead, puncture the silvered area with a fine needle and apply a strong decal setting solution like Solvaset or Micro Sol. The solution will wick under the decal and force it down. Only proceed once the silvering has completely disappeared.
Finally, use a tack cloth to sweep the model gently. Static electricity builds up on plastic during handling, attracting airborne dust like a magnet. The tack cloth picks up particles without leaving residue.
Environmental Setup
Lacquers are sensitive to temperature and humidity. Ignore environmental conditions at your peril.
Humidity is the enemy of lacquer finishes. High humidity causes “blushing” or “frosting”—a milky white haze that ruins the finish. As lacquer solvent evaporates, it cools the model’s surface rapidly through evaporative cooling. If the air is humid, water vapor condenses into the wet paint film, trapping micro-droplets that dry into a cloudy haze. Never spray Dullcote if relative humidity exceeds 60-65 percent. If you must paint in humid conditions, add a retarder to slow drying and allow moisture to escape.
Cold paint flows poorly and atomizes unevenly, leading to “orange peel”—a bumpy, textured surface. Warm your paint bottle by placing it in a bowl of warm (not hot) water for five minutes before use. This lowers the viscosity and ensures a finer, smoother spray pattern.
Ventilation deserves emphasis. Lacquers contain toluene, xylene, and MEK (Methyl Ethyl Ketone). These are serious neurotoxins. A spray booth venting outdoors is critical. If you don’t have a booth, work outside or in an open garage while wearing your organic vapor respirator.
Paint Preparation
The “flat” in flat clear comes from matting agents—microscopic particles that settle to the bottom of the bottle like sediment. If these aren’t properly suspended, you’ll either get a glossy finish (if you draw from the top) or a chalky white mess (if you draw the sludge from the bottom).
Add two copper-coated BBs or stainless steel mixing balls to your paint jar. Shake vigorously for at least two minutes. The BBs act as a mechanical whisk, breaking up settled material.
For airbrushing, thin Testors Dullcote to a 50:50 ratio—one part Dullcote to one part lacquer thinner. This mixture atomizes beautifully into a fine mist and “flashes off” (dries) quickly, reducing the risk of damage to underlying paint or decals.
Always pour your thinned mixture through a fine mesh paint filter into the airbrush cup. This catches any dried clumps or dust, preventing clogs and splatters during application.
The Core Process: Applying the Fix
This is where theory becomes practice. The application technique determines whether you get a smooth, professional finish or a disaster that requires stripping and repainting.
Pre-Application Check
Set your air pressure between 15 and 20 PSI for thinned Dullcote. For Alclad, which is thinner, use 12 to 15 PSI. If pressure is too high, paint dries in the air before hitting the model, creating a rough, pebbly finish called “dry spray.” If pressure is too low, paint doesn’t atomize properly, resulting in large droplets that splatter.
Test spray on cardboard or a scrap model to verify your spray pattern is an even, fine mist. This also confirms your airbrush needle is clean and flowing properly.
First Pass: Light Dust Coat
The first coat is not meant to cover the model or create a finish. It’s an adhesion promoter and safety barrier.
Hold your airbrush 6 to 8 inches from the surface. Press the trigger for air, then pull back slightly for paint. Move the brush in smooth, sweeping passes across the model. Never stop moving. Start your spray off the model, sweep across, and stop off the other side. This prevents start/stop splatter from landing on your kit.
You want a “dust coat”—a speckled, semi-dry layer that creates “tooth” for subsequent coats to grab onto. This prevents wet lacquer from pooling and running. Crucially, because this coat dries almost instantly, it protects sensitive decals or acrylics from the “hot” solvents in the heavier coats that follow.
Building the Finish: Multiple Light Coats
Never try to achieve a dead-flat finish in one heavy pass. This leads to pooling, yellowing, and frosting.
Apply 3 to 4 light, semi-wet coats. Allow 10 to 15 minutes between applications. Lacquer dries to the touch quickly, but it needs time to outgas solvents. If you layer wet-on-wet too fast, you trap solvents beneath the drying skin, resulting in a soft, gummy finish that takes weeks to cure.
The final pass can be slightly heavier—a “wet” coat that allows the matting agents to flow out evenly. Move your airbrush closer (4-5 inches) but move your hand faster. The surface should look wet and glossy for a few seconds before dulling as it dries. This leveling action eliminates orange peel texture and ensures uniform matte coverage.
As you build up coats, watch for the transformation. The decal carrier film edges will disappear as they’re buried under the clear layers. Color differences between paint, plastic, and filler will equalize. The surface will stop reflecting light like a small shiny object and start absorbing it like weathered metal or fabric.
Special Areas: Cockpits and Clear Parts
Clear parts present a unique challenge. A flat coat on a canopy looks like fogged glass—an instant disaster.
Mask canopies precisely with Tamiya tape or liquid mask before spraying. Burnish the tape edges down firmly to prevent thin lacquer from wicking underneath. For open cockpits, stuff the opening with damp tissue or sponge to prevent flat spray from entering and dulling instrument dials, which should remain glossy to simulate glass faces.
Also mask navigation lights and landing light covers. A flat finish on these lenses destroys realism, turning what should be a clear lens into a dull lump of plastic.
Troubleshooting Common Problems
Even experienced modelers encounter issues with clear coats. Understanding causes allows quick fixes.
Orange Peel Texture
If your surface looks bumpy and textured like orange skin rather than smooth, the paint dried too fast or was applied too thick. This often results from spraying from too far away or using insufficient thinner.
Let the model cure fully for 24 hours. Gently wet sand with 1200-2000 grit sandpaper to knock down the high spots. Then re-spray with properly thinned Dullcote applied closer to the model, allowing it to flow out and self-level.
Dust Inclusions
Tiny specks trapped in the finish are frustrating but fixable. For large particles sitting on the surface, you can carefully flick them out with a new #11 blade while the paint is still tacky—though this is risky.
The safer approach is letting the paint cure, then sanding the inclusion flush with 2000 grit paper. Spot spray the area to blend the finish back to matte.
“Too Flat” or Chalky Appearance
If your model looks dusted with white flour, with desaturated colors and rough texture, you’ve experienced “chalking.” This happens when spray dries in the air before hitting the model or when matting agent concentration is too high.
Fix this by spraying a light coat of gloss clear over the chalky area. The gloss binder re-wets the white particles, making them transparent again. Once the gloss dries, carefully re-apply flat coat with proper technique—closer distance, more thinner—to restore the matte finish without the white haze.
Sometimes simply rubbing the chalky surface gently with a soft cotton cloth can burnish the rough particles down, restoring color without repainting.
Uneven Sheen
If some spots are dead flat while others remain satin or glossy, the paint wasn’t mixed properly or coverage was uneven.
Re-stir your paint vigorously. If using an airbrush cup, back-bubble air through it to remix. Then apply targeted mist coats to glossy areas until they match the surrounding matte finish.
Silvering (Post-Application)
If silvering appears after you’ve sealed the model, the clear coat trapped air under the decal. Use a needle to poke tiny holes in the silvered area. Apply strong decal solvent like Solvaset over the holes—it will wick underneath, soften the decal, and force it down. Once dry, mist flat coat over the area to blend it.
Advanced Tips: Taking It Further
Once you’ve mastered basic flat coating, you can use sheen manipulation for enhanced realism.
Restoring Flat After Touch-ups
If you need to repaint a detail after the final flat coat, the touch-up paint will likely have different sheen. Don’t spray the whole model again. Use a fine brush to dab thinned Dullcote onto the specific touch-up area. Alternatively, spray through a template—a hole cut in paper or a sticky note—held slightly above the surface. This creates a soft-edge blend that integrates the repair without hard demarcation lines.
Sheen Variation for Realism
Real aircraft rarely have uniform sheen. Oil stains are glossy, exhaust soot is ultra-flat, and fabric control surfaces are duller than aluminum skin. A uniform flat coat is better than toy-like gloss, but varied sheen represents the pinnacle of realism.
After your global flat coat, selectively add gloss varnish with a fine brush to fresh oil leaks on engine cowlings or landing gear. Use satin varnish on hydraulic actuators or oleo struts to suggest greased metal. On fabric-covered aircraft, mask fabric areas and spray them with dead-flat finish while leaving metal cowlings and panels with satin or semi-gloss. This subtle contrast tells the viewer “this is metal, this is cloth” without explanation.
Product Alternatives
While Testors Dullcote is the benchmark, other products offer advantages for specific situations. Alclad Klear Kote provides excellent durability for models that will be handled frequently. Tamiya XF-86 Flat Clear is an acrylic option with safer fumes, though trickier to apply without chalking.
Some advanced modelers create custom flat coats by mixing Tamiya Flat Base (X-21) with Future Floor Polish. This allows precise control of sheen level. However, X-21 is a concentrated matting agent, not a clear coat itself—it must be mixed with a carrier. Sprayed alone, it turns models opaque white.
The Professional Difference
The visual transformation achieved by proper flat coating cannot be overstated. When you apply that final unified clear coat, the “toy” disappears. Decal carrier film vanishes, merging markings with painted metal until they look factory-stenciled. The stark contrast between plastic, resin, and brass parts equalizes into a single material reality.
Light no longer bounces off your model like a shiny plastic object held in your hand. Instead, the surface absorbs light like a massive, weather-beaten machine viewed from across a tarmac. This is the “Scale Effect” in action—the surface texture tricks the viewer’s brain into perceiving size, weight, and material substance.
This process is the signature of professional scale modeling. It separates casual assembly from serious artistry. It validates all your previous effort. Without it, the best construction, most expensive photo-etch, and finest painting still looks like a high-quality toy. With it, even a mediocre build takes on the gravity and presence of a museum replica. It ties your visual narrative together, presenting a single, coherent reality to the viewer.
The five minutes you invest in this final step will make more difference to your model’s appearance than the previous five hours of detail painting. That’s not hyperbole—it’s the accumulated wisdom of modelers who’ve learned this lesson through experience.

Key Takeaways
- Unified flat finish transforms plastic into scale replica. The clear coat eliminates toy-like gloss by creating consistent surface texture that mimics weathered metal and fabric at scale.
- Multiple light coats prevent problems better than single heavy application. Build finish gradually with 3-4 thin layers, allowing 10-15 minutes drying time between coats to avoid runs, frosting, and solvent trapping.
- Testors Dullcote and Alclad Klear Kote Flat deliver professional results. These lacquer-based products provide durable, dead-flat finishes when thinned 50:50 with lacquer thinner and airbrushed at 15-20 PSI.
- Preparation prevents permanent problems under sealed finish. Remove dust, check for decal silvering, and degrease surfaces before spraying—flaws sealed under clear coat cannot be corrected without stripping.
- Safety requires organic vapor respirator and ventilation. Lacquer fumes contain neurotoxins; standard dust masks provide no protection from solvent vapors.