


Two published full builds praise Airfix’s B-24H for excellent fit and clever engineering. The catch? A stubborn tail-sitting habit and a hidden interior you should weigh before you buy.
Quick Verdict
The Airfix 1/72 Consolidated B-24H Liberator earns a confident but conditional recommendation. Buy it if you specifically want an H-model Liberator and you’re ready to plan a 278-part, four-engine project around its weight and masking demands.
Two published full builds back that verdict. Mike Klessig, in a FineScale Modeler Workbench Review, reports excellent fuselage and nose joins and several smart engineering touches. Frank Spahr’s modified full build for Modeling Madness also rates the molding, fit, and clear parts highly.
The essential caveat comes first, though. Both builders had to fight the B-24’s urge to sit on its tail. Klessig added hardware inside the nacelles. Spahr packed more weight into the nose-gear well and then built a cradle to spare the plastic landing gear. Most of the detailed interior also disappears once the fuselage closes.
A true first-timer should start smaller; our roundup of the best model airplane kits points to gentler projects. Everyone else should read on for the true cost, the weight fix, and how this kit measures up against Hasegawa.
Brief Overview
What It Is
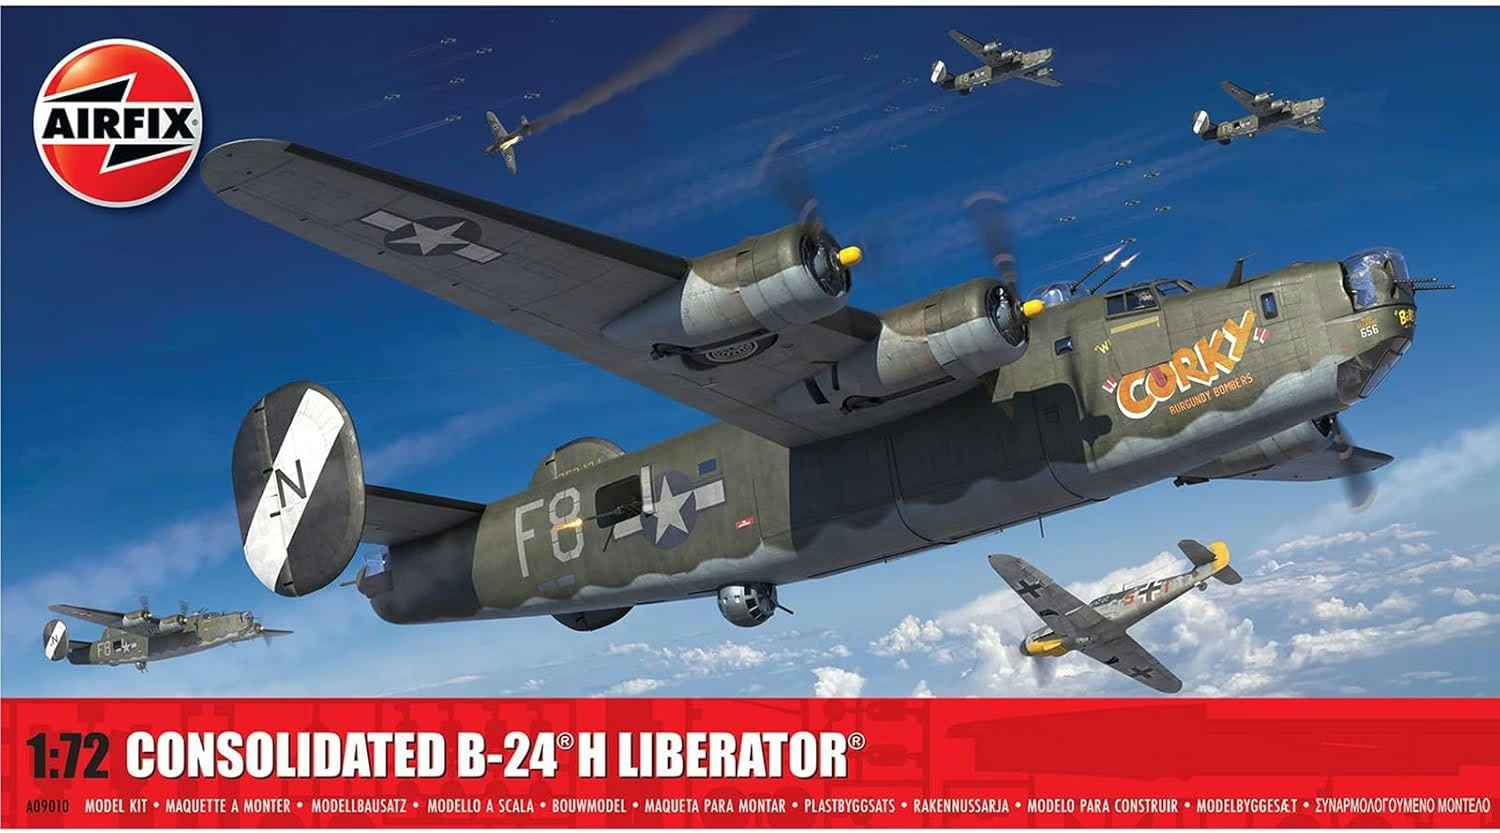
Airfix’s A09010 boxing is a new-tool 1/72 kit introduced in 2024. Airfix’s design feature on the project names Chris Joy as its designer. Airfix positions the H as the Liberator designed from the outset with an electrically operated Emerson A-15 nose turret, although earlier variants received nose turrets too.
Consolidated Aircraft built the bomber around the long, narrow Davis wing, and Airfix’s design notes give close attention to that wing and its internal support formers. The type flew on four Pratt & Whitney R-1830 radials, and Ford built Liberators at its Willow Run plant in Michigan.
Inside the box you’ll find:
- 278 parts molded in gray and clear plastic
- An instruction sheet, a paint guide, and a decal sheet
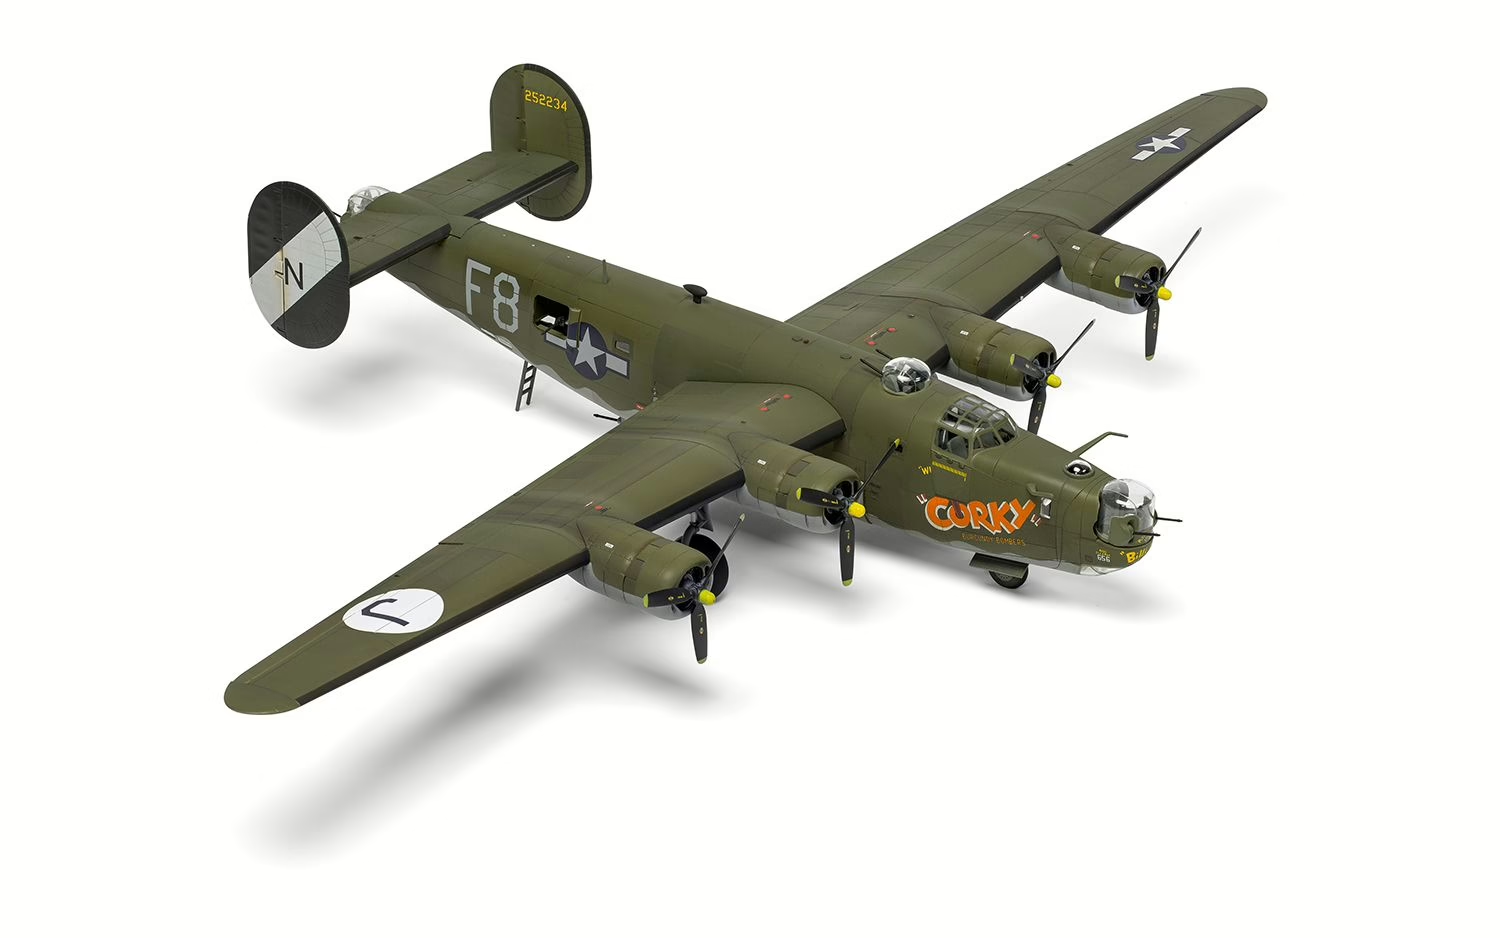
- Two marking options: B-24H-10-FO 42-52234 Corky Burgundy Bombers of the 733rd Bomb Squadron at RAF Old Buckenham, Norfolk, England, in 1944, and B-24H-15-FO 42-52699 Valiant Lady of the 831st Bomb Squadron, 485th Bomb Group, Fifteenth Air Force, at Venosa, Italy, in 1944
Airfix rates the kit Skill Level 3 and labels it for ages 8 and up. Masks, paint, cement, and nose weight are not included.
Who It’s For
This kit suits builders who want a United States Army Air Forces (USAAF) heavy bomber and have room to display one. The 465 mm wingspan works out to about 18.3 inches, so an 18-inch shelf won’t do. Measure your display spot and allow clearance beyond the bare span. You should also be ready for a multi-session project with a deliberate balance plan.
Cool Features That Solve Real Problems
- Two built-in ballast compartments → planned homes for nose weight. Airfix describes two hidden forward-fuselage compartments for weight. It also says the rear crew ladder can help support the model’s attitude. Both full builds still needed more weight.
- A separate nose section → a clean join at a traditional trouble spot. Klessig reports a flawless nose-to-fuselage join, and Spahr says his nose join needed almost no seam work.
- Pin-located, flattened tires and turret seams on panel lines → correct wheel position and tidier glazing. According to Klessig, a small pin at the base of each main gear leg mates with a dimple in the tire, which positions the flattened tire correctly. He also reports that the turret breakdown puts the seams along panel lines.
Ready to look? If the H model’s Emerson nose turret is the Liberator you want, check current pricing and availability for the Airfix 1/72 B-24H on Amazon. Confirm kit number A09010, the seller, and shipping before you order. As an Amazon Associate, we earn from qualifying purchases.
Pros & Cons
Pros
- Excellent fit at the critical joints. Klessig reports perfect fuselage halves and a flawless nose join.
- Problem-solving engineering. The kit has designed-in ballast compartments, pin-located tires, and turret seams that follow panel lines.
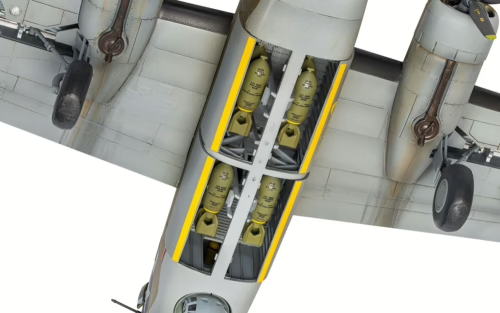
- Useful options. Klessig lists selectable flaps, landing gear, bomb bay, waist windows, and cowl flaps.
- Quality moldings and instructions. Spahr praises the molding, the fit, the clear transparencies, and the well-staged instructions.
Cons
- Tail-heavy tendency. Both builders needed weight beyond the designed compartments, and Spahr also built a support cradle.
- Hidden interior. Klessig says the detailed interior is mostly invisible once assembled, except for the bomb bay.
- Extra spend on masks. Masks aren’t in the box. Klessig used Eduard’s set (No. CX667), and Spahr used New Ware masks.
- A few soft spots. Klessig calls the engines modest, notes the fixed ailerons, and found the waist-gun ammunition belts awkward enough to leave off.
Who Should Buy It
Buy it if you are…
- A builder ready for the next step. The kit suits you if you’re comfortable with staged assembly, dry fitting (test assembly without glue), and planning a model’s balance before closing it up. The reported fit is excellent, but the size of the job doesn’t shrink.
- A 1/72 bomber collector who wants the H specifically. The Emerson nose turret and the two USAAF schemes define this boxing.
- A subject-specific or family-history builder. Spahr’s Royal Canadian Air Force (RCAF) conversion with DK Decals sheet No. 72067 shows the kit can take aftermarket markings. His sharkmouth decal still needed a patch, though, so research your exact aircraft before buying decals.
Skip it (for now) if you are…
- A true first-timer. The Skill Level 3 rating and the ages 8+ label are manufacturer labels. They aren’t evidence of beginner success, and the 278-part count plus the weighting work both builders describe make this a demanding first kit.
- A detail purist who wants a visible interior. The bomb bay is the main documented viewing opportunity.
- Short on display space. You’ll need a protected spot wider than 18.3 inches.
How It Stacks Up: Value, Rivals, and True Total Cost
The Rivals
- Hasegawa 1/72 B-24J (No. 01559). This 2008 release followed Hasegawa’s 2007 B-24D. Reviewer Lee Kolosna, in a full build for Modeling Madness, calls it generally accurate. He also notes a sparse interior, substantial ballast needs, and window and vent limitations specific to individual variants. His view of the older tooling is plain: “the Hasegawa kits, which are still extremely competitive in this scale.” Kolosna’s ranking of the Airfix kits rests on sprue photographs, not an assembled model.
- Hasegawa 1/72 B-24D (No. E28). Paul Boyer’s 2008 FineScale Modeler review of that boxing reports crowded instructions, weak attachment points for the interior components and nose, inaccurate nose-gear doors, and very good wing fit. Hasegawa recommended 90 grams (about 3.2 oz) near the nose gear, and Boyer used a tail stand instead. Treat this as a historical boxing; don’t transfer its flaws to the J.
- Academy 1/72 B-24 series. Kolosna criticizes the series for undersized nacelles and cowlings.
- Airfix 1/72 B-24D (No. A09011). Chris Surber dates this sibling to 2025. It has 258 parts, Skill Level 3, and two schemes. The first is Lady Be Good (41-24301), 514th Bomb Squadron, 376th Bomb Group, Ninth Air Force, Soluch, Libya, March 1943. The second is Hell’s Belle (41-24290), 400th Bomb Squadron, 90th Bomb Group, Fifth Air Force, Iron Range, Queensland, Australia, mid-1943. The D has a different nose and different subjects, so don’t assume the H build results carry over automatically.
Availability isn’t a clear Airfix advantage, either. As of October 20, 2026, U.S. retailer Scalehobbyist listed A09010 as backordered and the Hasegawa B-24J in stock, shipping in one to three business days.
Comparison Table
| Kit | Tooling era | Variant | Engineering/fit (per sources) | Known weaknesses | Best for |
| Airfix A09010 | New tool, 2024 | H | Excellent fuselage and nose joins (Klessig); good molding and fit (Spahr) | Tail-heavy; hidden interior; one small window wouldn’t fit (Spahr) | An H subject with balance planning |
| Hasegawa 01559 | 2008 (after 2007 D) | J | Generally accurate (Kolosna) | Sparse interior; substantial ballast; variant-specific window and vent limits | A specific J subject |
| Hasegawa E28 | 2007 D tooling | D | Very good wing fit (Boyer, 2008) | Crowded instructions; weak interior-part and nose attachment; inaccurate nose-gear doors | A D subject, after checking its configuration |
| Airfix A09011 | 2025 | D | Not covered by the H builds | Don’t assume H results transfer | A glazed-nose D subject |
The True Cost of Finishing This Kit
The box covers the plastic, decals, and instructions. You’ll still need:
- Nose weight. Plan for more than the designed compartments hold.
- Plastic cement.
- Primer and paints. Airfix’s callouts use Humbrol; Scheme A lists Humbrol Acrylic 155 Olive Drab and 33 Black among its colors. If you use another brand, match the colors yourself.
- Masking supplies. Brett Green’s HyperScale FirstLook identifies Eduard’s CX667 as self-adhesive, die-cut masks for this kit’s clear parts and wheels.
- Optional extras. Consider a display cradle, Scale Aircraft Conversions metal landing gear (No. 72207), and Eduard’s photo-etched metal (PE) sets for the cockpit and engines (No. 73829) or the ZOOM set (No. SS829). None of these is required to finish the kit.
Audit what’s already on your bench before buying duplicates, then check the current kit price at the retailer.
Value Verdict
We’d pick A09010 if the H is the Liberator you want: the documented fit and engineering make a strong case. Choose your aircraft first, though. A J subject points to Hasegawa, which Kolosna still rates as competitive, and a glazed-nose D points to A09011. No discount fixes a variant mismatch.
Expected Experience with Airfix 1/72 Consolidated B-24H Liberator
Before You Glue: Plan the Weight
Airfix designs in two ballast compartments, and the sources describe them differently:
- Klessig reports a compartment for 30 grams (about 1.1 oz) under the radio operator’s floor, with extra space behind the instrument panel.
- Chris Surber, in an IPMS/USA review of the Scale Aircraft Conversions landing gear, reports that the instructions call for 55 grams (about 1.9 oz) of forward ballast in total. He warns builders to keep space clear in the nosewheel well for the gear.
In practice, builders should expect to add more. Spahr couldn’t fit 30 grams into the reserved compartment and added metal elsewhere. His finished model still sat on its tail until he put more weight in the nose-gear well. Klessig found the airframe tail heavy while test-fitting the wings and solved it by gluing two half-inch nuts together for each engine nacelle. Neither build establishes a universal extra amount. We’d tape the major assemblies together and check the sit before closing the fuselage.
⚠ Warning: Heavy weight loads stress plastic landing gear. Spahr built a cradle for exactly that reason. Surber describes three nose-gear mounting contacts and calls the kit parts stout, but no source reports a measured load limit.
Interior and Fuselage
Expect a long interior phase for detail you’ll mostly never see again. Spahr left out hidden interior parts and some bulkheads. He ended up with gaps around the bomb-bay doors, which he attributes to his own handling rather than to the kit design. We’d still install any bulkhead that helps align the structure. Klessig, building the kit as designed, reports that the fuselage halves mated perfectly and joined the nose flawlessly.
Wings, Engines, and Gear
The kit provides two sets of vertical tails, so Klessig advises picking the correct pair. He also notes that the main wheel hub tapers, which means you need to install it from the proper side. The flaps and cowl flaps are posable, but the ailerons are fixed. Surber found that Step 96 of the nose-gear installation needed clarification.
💡 Tip: Klessig left the bomb-bay parts off until final assembly. The open bomb bay gave him a convenient handhold for painting, and he followed the suggestion to leave the waist guns off until the end.
Turrets, Clear Parts, and Masking
Klessig reports that the turret seams fall along panel lines, and he masked the clear parts with Eduard’s CX667 set. Spahr says the main transparencies fit very well. When the first small window wouldn’t fit, he glazed all the small windows with thin polyvinyl acetate (PVA) glue instead. Masking a bomber with this much glazing takes real time. Klessig didn’t track his hours, and no published build gives a total.
Painting and Decals
The kit’s paint callouts use Humbrol. Klessig says the decals performed flawlessly. Spahr calls the kit decals well printed and rates his DK Decals markings highly, but the aftermarket sharkmouth needed a patch, and some propeller decals lifted under masking tape over a clear coat he says wasn’t sturdy enough, so he reapplied them.
Where the Airfix 1/72 Consolidated B-24H Liberator Really Shines
The payoff here is engineering that respects the builder. Picture the nose section closing up against the fuselage without a filler session. Klessig reports exactly that, and Spahr found the same join nearly seam-free. That is the moment builders of older B-24 kits will appreciate most.
The turrets reward patience too. Because Airfix split them along panel lines, you won’t be sanding glue seams out of the glazing. The pinned main tires add a quieter kind of satisfaction: the wheels sit where they should, flats down.
Then there’s the result on the shelf. Klessig reports that the model matches his references dimensionally, and his summary is blunt: “The level of detail, the fit, and the engineering are all top notch.” Spahr, working with a heavily modified build, also comes away calling it a fine kit capable of a handsome model out of the box. At about 18.3 inches across the wingtips, the finished model will dominate a 1/72 display.
Airfix 1/72 Consolidated B-24H Liberator (A09010)
Scale: 1/72 · Parts: 278 · Markings: two USAAF schemes
Best for: an H-model fan ready to plan ballast and masking
FAQ
Q: Is the Airfix 1/72 B-24H Liberator a good kit for a beginner who has only built a couple of fighters?
A: The Airfix 1/72 B-24H is a qualified yes for a beginner who is comfortable with staged assembly, ballast planning, and masking; a set number of finished fighters is not the test.
- Airfix rates it Skill Level 3, but it has 278 parts.
- Both published builds needed extra weight to keep the nose down.
Q: How much nose weight does the Airfix B-24H Liberator need so it doesn’t sit on its tail?
A: No published build establishes a single nose-weight total that works for every Airfix B-24H.
- Klessig describes a 30-gram compartment; Surber reports a 55-gram total in the instructions.
- Both full builds needed more, so we’d test before closing:
- Tape the fuselage, wings, and tail together.
- Support it at the main-gear axle line.
- Add weight at its intended location until the nose stays down.
- Keep the nosewheel well clear for the gear.
Q: What extra supplies do I need to buy to finish the Airfix 1/72 B-24H, beyond the kit itself?
A: To finish the Airfix 1/72 B-24H, plan on nose weight, cement, primer, paints, and masking supplies.
- Pre-cut masks such as Eduard CX667 are optional but useful.
- A display cradle, metal landing gear, and PE detail sets are optional extras.
Q: Should I buy the Airfix B-24H or the Hasegawa B-24J if I want the most accurate 1/72 Liberator?
A: The published reviews don’t crown an accuracy winner between the Airfix B-24H and the Hasegawa B-24J, which depict different variants.
- Klessig reports that the Airfix kit matches his references; Kolosna calls the Hasegawa J generally accurate.
- Choose the variant your subject requires first.
Q: What’s the difference between the Airfix B-24H and the Airfix B-24D Liberator kits?
A: The Airfix B-24H (A09010) and B-24D (A09011) depict different Liberator variants, with different part counts and markings.
- The H has 278 parts and the Emerson A-15 nose turret; the D has 258 parts and a glazed nose.
- The H offers Corky Burgundy Bombers and Valiant Lady; the D offers Lady Be Good and Hell’s Belle.
Q: How can I see the interior detail once the Airfix B-24H fuselage is closed up?
A: The bomb bay is the main place the Airfix B-24H’s interior detail remains visible after closing up.
- Klessig reports the rest is mostly hidden once assembled.
- Spend your detailing effort on visible areas, but keep any bulkhead that aligns the structure.

Key Takeaways
- A strong buy for builders who want an H-model Liberator: two published full builds praise its fit and engineering.
- Plan on more nose weight than the designed compartments hold, and consider a cradle to protect the plastic landing gear.
- Budget for masks, weight, cement, and paints on top of the kit.
- True first-timers should start smaller; choose the H, D, or J by subject before comparing brands.