
The Revell 1/48 B-25J Mitchell will frustrate you, teach you, and ultimately make you a better builder. Here’s exactly what to expect.
The scale model aircraft market in 2026 is defined by unprecedented engineering sophistication. Slide-molded kits with flawless fitment, breathtaking micro-detail, and recessed rivet work so fine you need magnification to appreciate it—they’re everywhere, and their manufacturers want you to believe anything older is obsolete. Against that backdrop, dedicating a full evaluation to a kit whose tooling architecture dates back nearly fifty years might seem like an exercise in nostalgia. It isn’t.
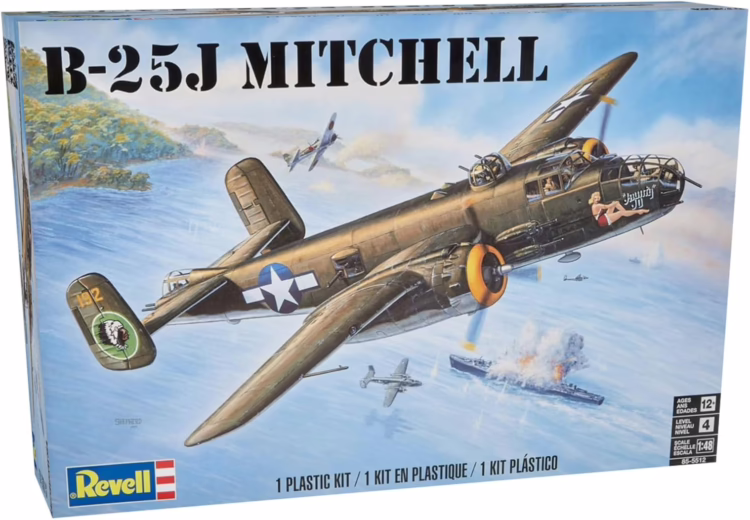
The Revell 1/48 B-25J Mitchell (Product #85-5512) has never left hobby shop shelves, digital storefronts, or competition display tables, and that persistence demands a proper explanation. Evaluating the best model airplane kits means looking well beyond parts counts and CAD marketing language. For builders looking to graduate from single-engine fighters into the demanding world of multi-engine bombers, the current premium market is both technically unforgiving and genuinely expensive. This review delivers an evidence-based assessment of whether the Revell B-25J’s value-to-performance ratio still makes sense in 2026—and where the kit will genuinely test your patience.
Brief Overview
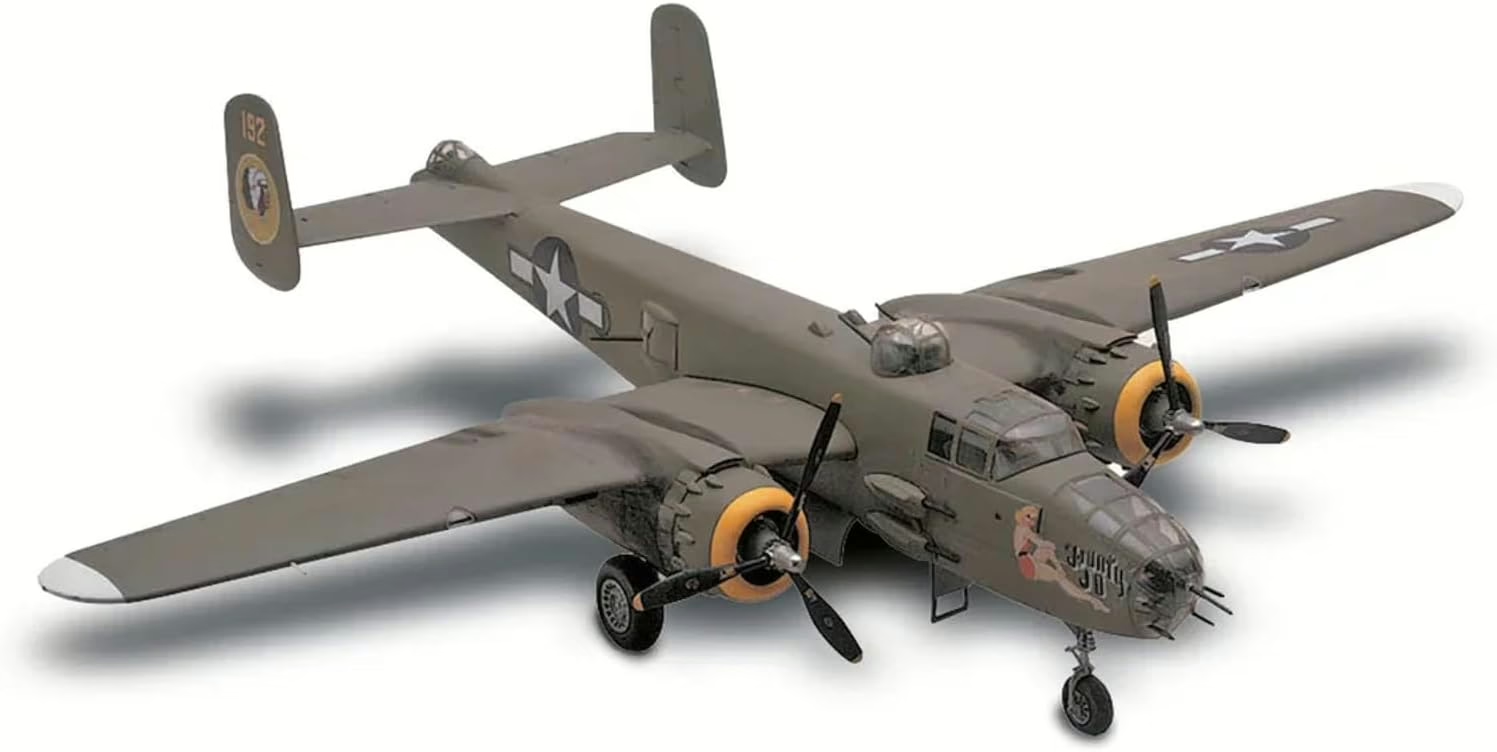
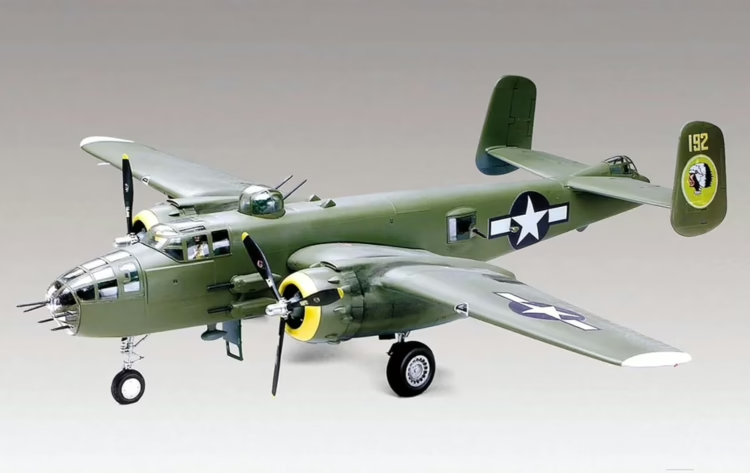
The Revell 1/48 B-25J Mitchell is a large-scale plastic model kit replicating the final, most widely produced production variant of North American Aviation’s legendary World War II medium bomber. Molded predominantly in silver styrene with accompanying clear transparency sprues, it presents an imposing footprint on the workbench, complete with a fully detailed interior command deck, a viewable structural bomb bay, and positionable crew access doors. The kit (Product #85-5512) is a 2011 rebox of the original Monogram 1/48 tooling first released in 1977—updated with modernized instructions and substantially improved decal sheets.
The primary audience is beginner to intermediate scale model aircraft builders who want to step up from entry-level kits to a larger, more complex project without committing to premium pricing. Three features make this kit specifically practical for that transition.
Deep interior sub-assemblies. A detailed cockpit, dedicated bombardier’s station, and complete structural bomb bay come molded with enough three-dimensional relief that beginners can achieve convincing results using basic enamel washes—eliminating the immediate need for expensive aftermarket resin upgrades. Multiple armament options in the box. Strap-on fuselage gun packs and optional ventral gun packs allow builders to accurately replicate specific historical theater configurations without sourcing additional parts. Dual transparency sets. Two complete sets of canopies and glass turrets provide a genuine safety net for the inevitable accidents during gluing and masking—one of the more pragmatic inclusions found on any kit at this price tier.
Check current price and availability on Amazon
The Real-World Utility Test: Build Experience & Value
What You’re Actually Working With
The plastic in Revell’s #85-5512 box traces directly to the Monogram 1/48 B-25 tooling of 1977—for decades regarded by the modeling community as an exceptionally balanced combination of buildability, parts count, and interior richness. One practical note up front: the silver styrene used in this release is prone to visible flow marks and swirling from the injection process. These can conceal surface flaws until a uniform coat of primer reveals them, so don’t skip that step.
The defining characteristic of this tooling—and its most debated feature—is raised panel lines and raised rivets. Builders conditioned on modern recessed detail will flag this immediately as a complication, and rightly so: aggressively sanding a fuselage seam destroys raised surface detail that is genuinely laborious to restore. However, context matters. The real B-25 Mitchell was not a flush-riveted fighter. It was a utilitarian bomber constructed from overlapping aluminum alloy sheets fastened with thousands of raised, round-head rivets. The Revell kit’s texture is, paradoxically, more historically authentic for this specific aircraft than the smooth flush surfaces many premium competitors deliver.
Cockpit, Interior, and the Nose Gear Trap
Construction begins inside the fuselage, and the 1977 tooling holds up well here. Deeply molded bulkheads, side consoles, radio racks, and bomb bay structures respond beautifully to dark brown enamel washes and light grey dry-brushing—letting a beginner produce a convincingly shadowed interior without reaching for photo-etch (PE) sets. For paint selection, Mission Models Interior Green #34151 is the correct base coat for the cockpit and crew stations; gear wells and the bomb bay structure call for Model Master Yellow Primer to represent the zinc-chromate finish applied during production. A thinned Vallejo Dark Brown or Tamiya Black wash pooled into the deeply molded bulkhead recesses produces the shadowed, three-dimensional effect the 1977 tooling handles particularly well. For the bomb bay specifically, a heavily thinned pass of AK Interactive Engine Oil across the floor and structural ribs simulates the hydraulic fluid and grease accumulation characteristic of a working aircraft—critical if you plan to display the doors open. The molded-in instrument detail, in particular, is sufficiently three-dimensional that carefully hand-painted panel faces frequently look more convincing than the flat, two-dimensional PE alternatives. That said, the pilot’s foot pedals are noticeably undersized, and the throttle control levers between the yokes are poorly defined and fragile. Advanced builders often scratch-build replacements using stretched sprue and fine wire—useful refinements, but not mandatory.
The fuselage closure introduces the build’s most consequential trap. After decades of high-pressure injection cycling, the large mold halves frequently arrive with minor warpage, requiring physical stress, clamps, and strong solvent cement to bring into alignment. Buried within this step is a critical flaw in the instruction sequence: the manual directs builders to glue the fragile nose landing gear strut into its retaining bracket before joining the fuselage halves. That protrusion then becomes a constant physical liability through sanding, masking, and airbrushing—and it will snap. The proven fix is to cut the upper trunnion, insert a short length of brass tubing, install only the hidden mounting point inside the fuselage, seal the halves, complete all exterior work, then slide the lower gear strut into the brass sleeve at the very end of the build. Treat this modification as mandatory, not optional.
Closing the fuselage will require modeling putty along the centerline seams and at the tail empennage junction. Sanding those seams smooth will inevitably eliminate the surrounding raised panel lines—forcing a choice between accepting a ghost seam devoid of detail, or undertaking the painstaking work of rescribing lost lines and restoring rivet heads individually with a pounce wheel.
Center of Gravity: Defeating the Tail-Sitter
Built straight from the box, this kit is a guaranteed tail-sitter. The heavily armed rear section of the J-model outweighs the relatively open glass nose, and the completed model will tip backward to rest on its tail gun station. Because the transparent nose and open cockpit leave few hidden voids up front, the builder must pack every available cubic millimeter: lead fishing sinkers and dense plumber’s putty under the flight deck and bombardier’s floor, additional ballast in the forward sections of both engine nacelles (ahead of the main landing gear pivot point), and—if those spaces still prove insufficient—closing the bomb bay doors entirely to create a large central void for more lead weight. Purpose-cast lead nose weights designed specifically for this Monogram/Revell kit, such as those produced by Terry Dean, are a genuinely worthwhile investment that saves considerable trial and error.
Wings, Nacelles, and the Kit’s Worst Fit Problem
The Wright R-2600 Twin Cyclone engines are rendered as simplified one-piece cylinder banks with heavily molded-in pushrods. Beginners will find them easy to paint; more experienced builders typically replace those pushrods with heat-stretched sprue or fine 34-gauge wire to simulate ignition wiring. Fortunately, the tight-fitting cowlings cast the majority of each engine in deep shadow, making the simplified kit engineering far less noticeable once assembled and painted.
What is noticeable—and the most widely condemned fit issue on the entire build—is the junction where the engine nacelles meet the gull-wings. The engineering tolerances here are poor enough that veteran builders describe the joint simply as “really bad.” Correcting it requires heavy polyester putty and prolonged sanding, which once again threatens the surrounding raised surface detail. Wing dihedral alignment also demands careful attention: the internal locating tabs allow enough play that an unchecked assembly produces a visibly lopsided stance on the display shelf.
For builders willing to go further, lowering the flaps is possible but demands cutting entirely through both top and bottom wing halves. The resulting gap at the forward edge requires filling with carved balsa wood, shaped and sealed with Tamiya putty to create a paintable surface. The kit’s engine cowl flaps are molded shut; opening them means punching holes with a micro pin vise and scratch-building flap faces from thin aluminum cut from soda cans.
Glazing, Gun Barrels, and Decals
The greenhouse glazing is generally free of optical distortion and clear enough to showcase the interior nicely. The challenge is fit: the main clear nose piece is frequently molded slightly wider than the fuselage opening, and forcing the join with heavy clamping creates a visible step between the grey plastic and the clear glass. The remedy is either shimming the fuselage to match the nose piece or carefully paring the edges of the clear part with a sharp hobby knife—a high-risk operation that can scratch or craze the transparency. Pre-enlarging the machine gun barrel holes in the clear parts with a pin vise before installation, then mounting the barrels on internal wire pins for post-paint installation, prevents the breakage that results from pushing fragile barrels through tight holes after the glass is glued. With the sheer number of individual window panes across the nose, cockpit, and turrets, an aftermarket die-cut masking set—such as the precision-cut sets from Eduard—is close to essential.
The modern decals in the 85-5512 release are a marked improvement over the thick, brittle, yellowed sheets from the original Monogram-era boxings. The kit supplies markings for two named aircraft: “Jaunty Jo” and “Panchito” (Serial No. 44-30734), the latter referencing a B-25J that served with the 41st Bombardment Group, 396th Bomb Squadron, in the Central Pacific. Both sets are particularly well executed. Dry-fitting the clear nose glass before committing the large nose art pieces to the fuselage is non-negotiable; the decals must clear the protruding machine gun ports cleanly, and cutting the film while wet is far preferable to attempting to shift a tearing sheet once it has begun to set. The B-25’s large surface area rewards careful finishing work regardless of scheme. For bare-metal builds—arguably the most visually striking option for the J-model—AK Interactive Extreme White Aluminum and Alclad II Dull Aluminum are both well-suited lacquers, applied over a flawless gloss black primer base to maximize reflectivity. Once sealed under a high-gloss clear coat, thinned enamel washes pooled around the raised rivets produce a high-contrast weathering effect that turns the 1977 tooling’s most criticized feature into a genuine visual asset. Whichever scheme you choose, the styrene accepts primer and topcoat cleanly—this is one area where the old mold gives nothing away to its modern competitors.
How It Stacks Up Against Competitors
| Kit | Tooling Era | Variant | Price Tier | Key Strength | Key Weakness |
| Revell (ex-Monogram) | 1977 | Late (H, J) | Budget/Entry | Excellent interior; proven value | Raised panel lines; poor nacelle fit; severe tail-sitter |
| Accurate Miniatures | 1999 | Early (B, C, D, G) | Mid-Tier | Superb recessed detail; precise engineering | No J-model; punishing tolerances; undersized cowlings (17.65mm vs. Monogram’s 17.89mm) |
| HK Models | 2023 | Late (J) | Premium | Modern slide-molding; recessed rivets | Pre-broken fuselage sprues; wavy, distorted clear parts; soft interior detail |
The Accurate Miniatures kit—frequently reboxed by Italeri or Academy—delivers genuinely beautiful recessed panel lines, but covers only the early B, C, D, and G variants. Building a late-war J-model like “Panchito” requires extensive modification. Its fit tolerances are also punishing: a single misaligned bulkhead or uneven sprue gate can throw the entire fuselage off alignment. The engine cowlings measure 17.65mm—noticeably smaller than the Monogram’s more accurate 17.89mm opening—and early runs featured vinyl window masks approximately 20 percent too large.
The HK Models B-25J promises the ultimate modern build experience at a premium price point. Community testing tells a more complicated story. Fuselage halves have been found snapped from their sprues at the factory, requiring restoration of delicate recessed rivet detail before the build begins. Clear nose and canopy parts frequently suffer from stippled, wavy distortion that demands polishing and treatment with clear acrylic floor wax. Interior detail around the tail-gun controls tests noticeably softer than the crisp 1970s Monogram moldings. For a builder who wants the specific late-war J-model configuration at minimum financial risk and without hyper-precise tolerances, the Revell kit remains difficult to displace.
Pros & Cons
Pros
- Interior that punches above its price tier. Deeply molded bulkheads, radio stations, and structural bomb bay take enamel washes beautifully, removing the need for aftermarket resin upgrades at the outset.
- Outstanding value proposition. Available at a fraction of the cost of modern premium toolings—representing minimum financial exposure for builders stepping up to a large, complex multi-engine kit for the first time.
- Built-in redundancy on clear parts. Two complete sets of canopies and turrets provide a practical safety net for the gluing and masking accidents that every builder eventually encounters.
- Armament flexibility out of the box. Strap-on fuselage gun packs and ventral gun packs allow accurate representation of specific theater configurations without sourcing additional aftermarket parts.
Cons
- Raised panel lines complicate seam work. Sanding fuselage centerline seams destroys surrounding detail; restoring raised rivets with a pounce wheel is time-consuming and frustrating for newer builders.
- Nacelle-to-gull-wing fit is the kit’s most serious structural flaw. Heavy polyester putty and extended sanding are unavoidable, threatening the raised surface detail in the model’s most visible zone.
- The instruction sequence is a trap. Installing the nose landing gear before fuselage closure, as the manual directs, effectively guarantees breakage; the brass tubing modification is mandatory.
- Severe tail-sitting without significant ballast. Correcting the center of gravity requires creative lead placement throughout the nose, nacelles, and potentially the bomb bay—a problem the instructions don’t acknowledge at all.
Where the Revell 1/48 B25J Mitchell Really Shines
The enduring appeal of this kit has nothing to do with its 1977 tooling date. It has everything to do with what the build actually produces—both the finished model on the shelf and the modeler left standing after completing it.
In an era where many premium kits require little more than careful parts cleaning and paint, this legacy tooling demands genuine problem-solving. Warped fuselage halves need coaxing into alignment. The center of gravity must be engineered, not assumed. The nacelle seams require patient remediation. Every one of those challenges, worked through methodically, produces a measurable improvement in core technique: putty application, seam blending, strategic assembly sequencing, weight management. A builder who completes this kit correctly has a substantially expanded skillset, acquired at minimum financial risk.
The historical dimension carries real weight too. “Panchito” (Serial No. 44-30734) is not an anonymous airframe. It flew combat missions over Okinawa and the Japanese mainland with the 41st Bombardment Group, 396th Bomb Squadron, its nose art drawn from a feisty Mexican rooster in the 1943 animated musical The Three Caballeros. After the war it served as an aerial fire tanker, then as an agricultural sprayer on Florida orange groves—its aluminum spaceframe nearly destroyed by corrosive chemicals—before being acquired by aviation preservationist Tom Reilly for a complete ground-up restoration. Today “Panchito” flies the national airshow circuit under the stewardship of the Delaware Aviation Museum Foundation, based at Delaware Coastal Airport in Georgetown, Delaware. Museum operators report that veterans who flew in Corsica, Italy, North Africa, China, and Okinawa regularly gather beneath its wings at events like the Ocean City Air Show and the Cocoa Beach Air Show—moved to tears by the sight and sound of the Wright R-2600 engines running again. Building this model in 1/48 scale is a direct, tangible connection to that specific, documented history—and the Revell kit’s rugged, overlapping raised-rivet surface, whatever its technical limitations, captures the mechanical character of a working bomber with an authenticity its flush-riveted competitors cannot replicate.
See the Revell 1/48 B-25J Mitchell on Amazon
Who Should Buy It
This kit is purpose-built for beginner to intermediate scale model aircraft builders in the U.S. who are ready to move from forgiving single-engine kits into the more demanding territory of multi-engine bombers—without the financial exposure of a premium tooling.
The ideal buyer values historical significance and substantial display presence over frictionless assembly. If you want to practice putty work, seam sanding, complex interior painting, and bare-metal lacquer finishing on a kit where a mistake costs dollars rather than triple digits, this is precisely what it was designed for. It’s also the only affordable kit on the current market covering the specific late-war J-model configuration that “Panchito” and other iconic Pacific theater B-25s represent.
Conversely, modelers who require CAD-precise recessed panel lines, zero-putty assembly, and modern engineering tolerances should look elsewhere. This kit will frustrate anyone approaching it with the expectations of a 2023 tooling. It rewards patience and engagement with the material; it punishes builders who expect it to meet them halfway.

Key Takeaways
- The Revell 1/48 B-25J Mitchell (85-5512) is a 2011 rebox of a classic 1977 Monogram tooling, offering detailed interiors and multiple armament options at a budget price point.
- Raised panel lines, poor nacelle-to-wing fit, and a severe tail-sitter problem demand patience—but each challenge directly builds core modeling technique.
- Modify the nose gear installation with brass tubing before closing the fuselage; the manufacturer’s sequence practically guarantees breakage.
- Against its two main rivals, it remains the only accessible kit covering the late-war J-model configuration; the premium HK Models alternative carries significant quality control concerns at a far higher price.
- Best suited to beginner-to-intermediate U.S. builders who want to work the plastic—not just assemble it.